Scrapbooks, photo albums and videos are the usual methods for tracking treasured memories, but this can also be done by creating a family art project: a work of art that families can collaborate on together. It’s a way of recording significant memories with loved ones.
I recently led a collaborative family art project by tapping into a family’s treasured memories. This project uses acrylic paint and collage.
Here are some steps to guide you in making your own family art project:
1. Begin by exploring what acrylic paint can do.
If mistakes are made, it’s easy to paint over and start again. Make different textures by pressing various items (see the supply list at the end of this article for examples) into paint, then transfer this onto paper.
2. After playing with the paint, participants collaborate on an acrylic painting with ’treasured memories’ as the theme.
Collage images of printed family photos and / or treasured objects (see the supply list at the end of this article for examples), such as dried flowers, can be used. If using photos it helps to print them on standard copy paper. It’s helpful if these images can be resized to fit onto a canvas. They are cut out and glued onto the painted canvas using polymer medium. Polymer medium is similar to white glue, which dries clear.
3. Decide on an overall mood for the artwork.
The example above shows an uplifting feeling. This was created with warm ochre earth tones and a brilliant blue sky with a splash of sunlight. Textures are added on top of the base colours by using the various printing techniques explored earlier.
4. Next, examine possible focal points where the centre of attention would be.
It helps to first discuss how different elements can attract the viewer’s focus. For example: contrast, placement and size of objects.
5. The family members are ‘the stars’ in this painting.
The artwork above shows the family placed in the centre of the composition. Other key images are placed around the canvas then re-positioned as ideas became more defined. Painters tape is used to temporarily position the images and objects before gluing them in place.
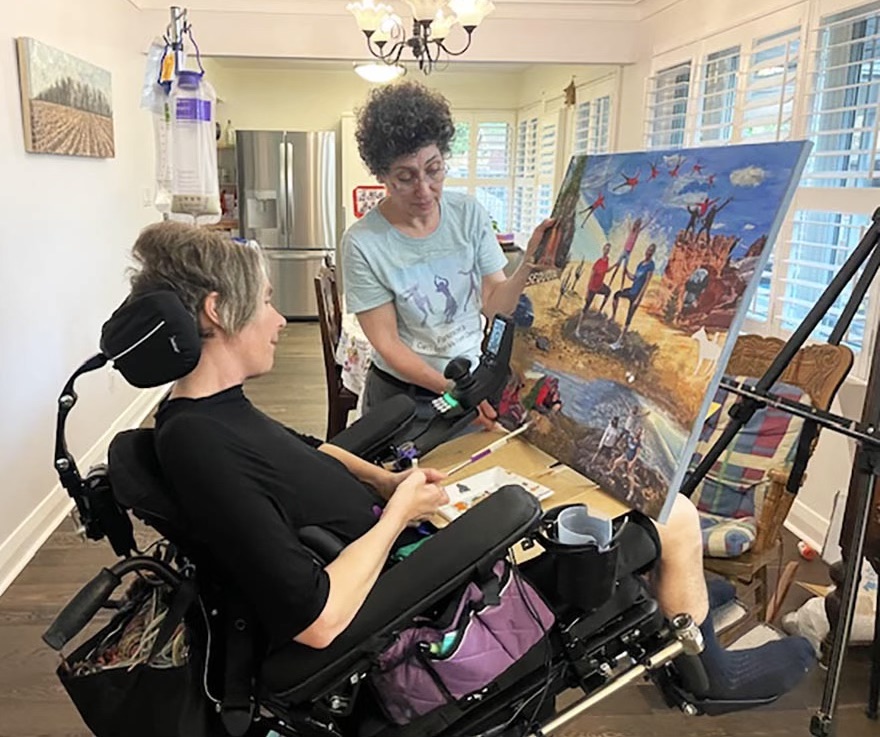
6. If a participant’s arms are too weak to lift up to the canvas, a long cooking spoon, or ruler can be used to tape on a paintbrush to extend its reach.
In this photo our artist holds a retractable back scratcher with a paint brush taped to it, allowing her to reach the canvas while I hold the artwork on her lap.
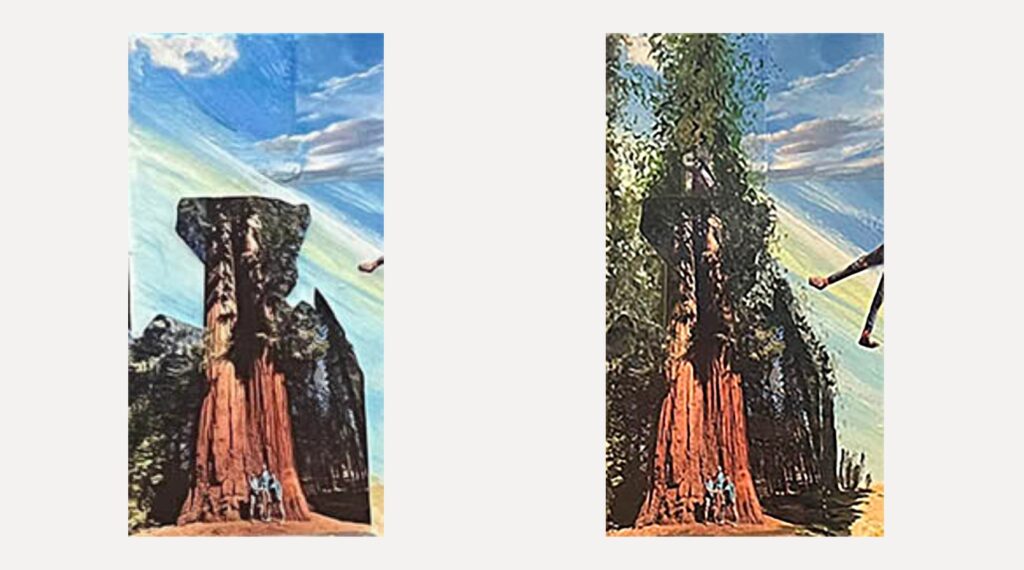
7. It’s helpful to use paint to blend the cut-out collage images into the surroundings.
Here is an example of before and after doing this:
8. Once the painting is finished, add a layer of polymer medium over the surface of the painting.
This protects the artwork from damage and keeps collage pieces in place. Next, paint the edges of the canvas and add a wire for hanging.
I hope you enjoy the process of creating this artwork together, celebrating treasured memories while creating new ones.
List of useful family art project supplies:
- Painters tape, scissors, polymer medium (or white glue with a small amount of water to make it the texture of yoghurt)
- Items used to print textures, e.g. stencils, bubblewrap, sponges, mesh bags and crumpled plastic bags
- Acrylic paints (e.g. non-toxic, fluid paint), paint brushes of various sizes
- Collage images, small keepsakes such as movie tickets, a feather, map, dried flowers and a lock of hair
- Large pre-stretched canvas
- To clean brushes use small containers with water, paper towel or rags
Find out more about creativity and Parkinson’s. Photos supplied by the Baskin-Johnson Family